corpora.ai: Advanced Features - Simplifying prompts
Corpora.ai Prompting Language showed that greater control over research was a necessity. Which is why we have developed Advanced Query Settings.

Having previously discussed corpora.ai Prompting Language (CPL) we could see that greater control over research was a necessity rather than an optional extra. This is why in our latest release we have introduced Advanced Query Settings.
What are Advanced Query Settings?
Advanced query settings provide our customers with a user interface in order to interact with CPL. We think that this will allow a wider range of consumers to get the best out of their research, without having to learn about CPL in depth. To read more about CPL read this article. Currently there are three controls that can be altered: start date, end date and source types. These refine the data that the patented research engine uses to produce your documents, allowing you to scope your research to your needs.
How Do I Use Advanced Query Settings?
There are two places that you can edit your settings. The Explore page and the Query Settings page. Any settings you alter on the former apply to your current (or next) search, while the Query Settings page is designed to allow you to provide default values.
Current Search
To apply settings to your current search, we have added another button next to Add Hashtags. When clicked it will display the Advanced Settings dialogue to allow you to enter your desired values. When selected, these will be added to the next query you run, and then your default values will be resumed.
Demonstration of Advanced Settings from the Explore page
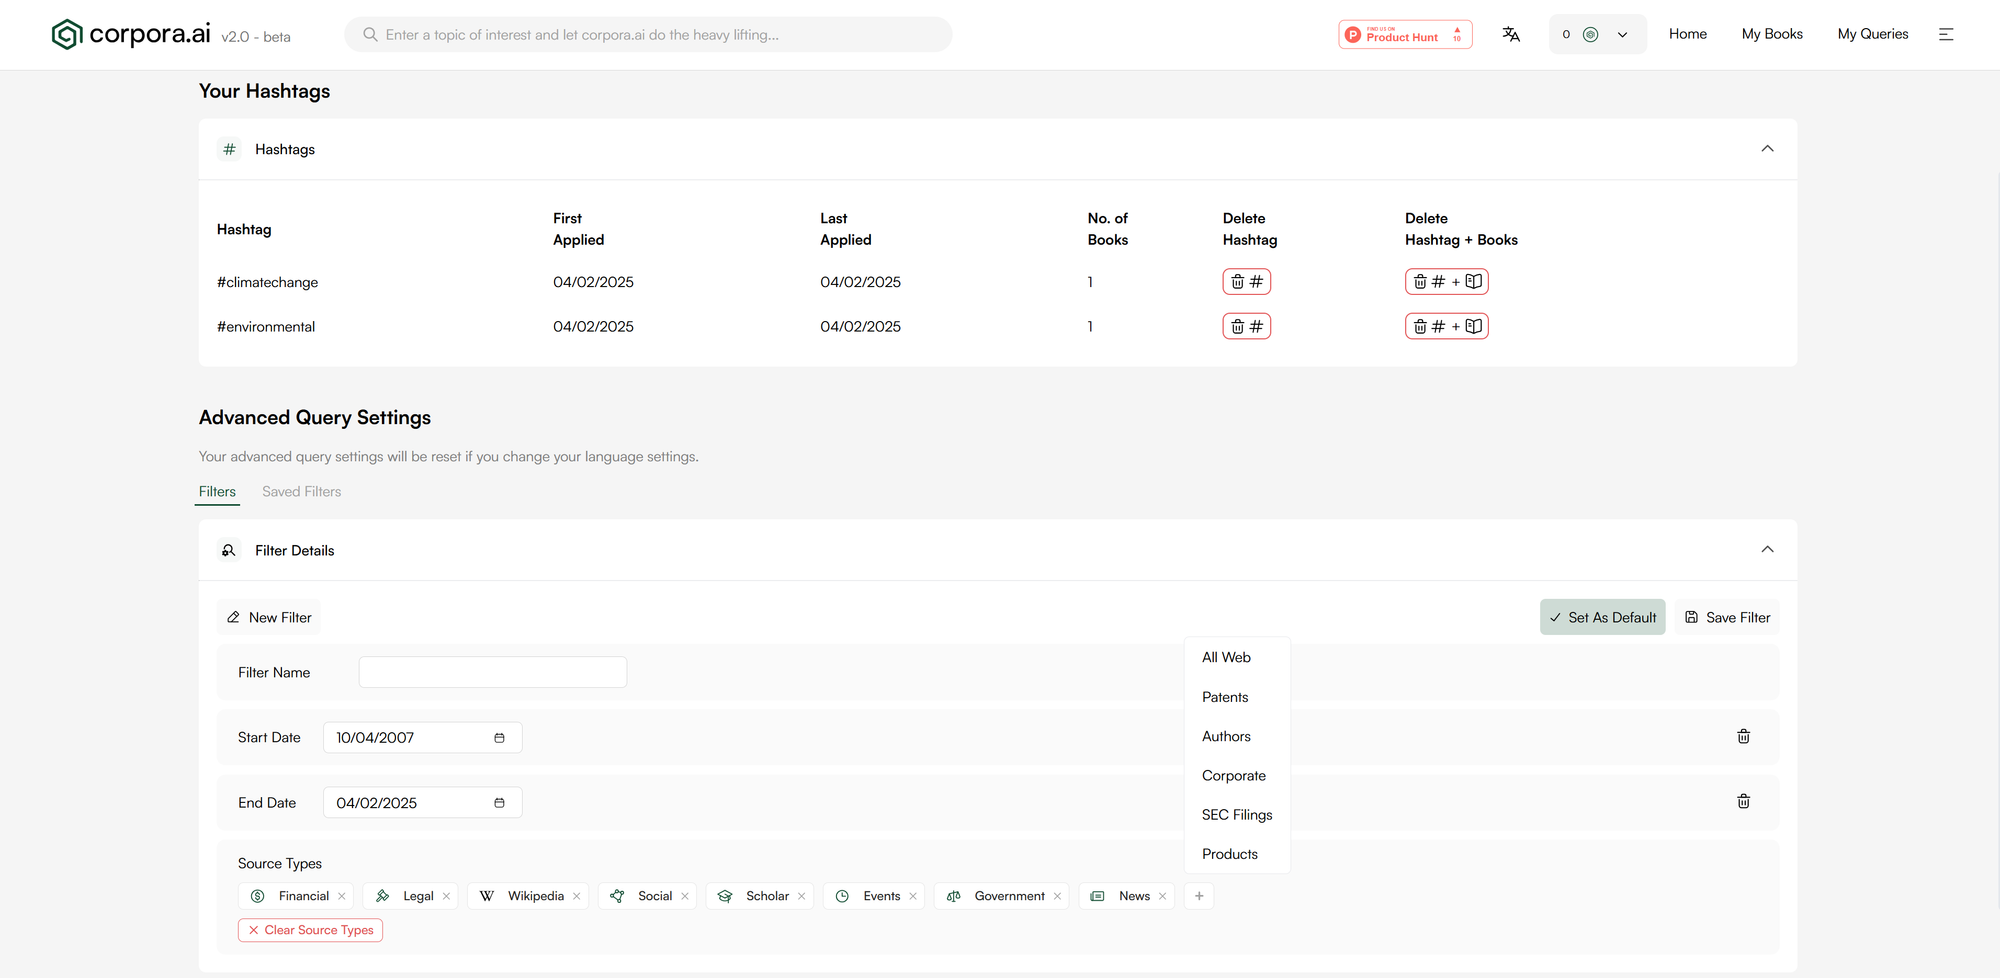
Default Values
The default values are assigned within the Query Settings page. We have added a section below Your Hashtags with a similar view to the Advanced Settings dialogue. From here, any values you set will be applied by default to any future queries, of course you can still change them for a specific topic from the Explore page.
How Do I Know What Settings Were Used?
If there are multiple queries about the same topic with different settings applied, it can be difficult to keep track. This is why we have added indicators on both My Queries and the Overview that is generated. If you have used CPL programmatically, we will leave your query as is to ensure it is clear what was added to the query when originally viewed. However, if using the Advanced Feature interface, we have added visuals to differentiate the difference between searches. These changes not only make it easier to differentiate between what settings were applied but also how they were applied.
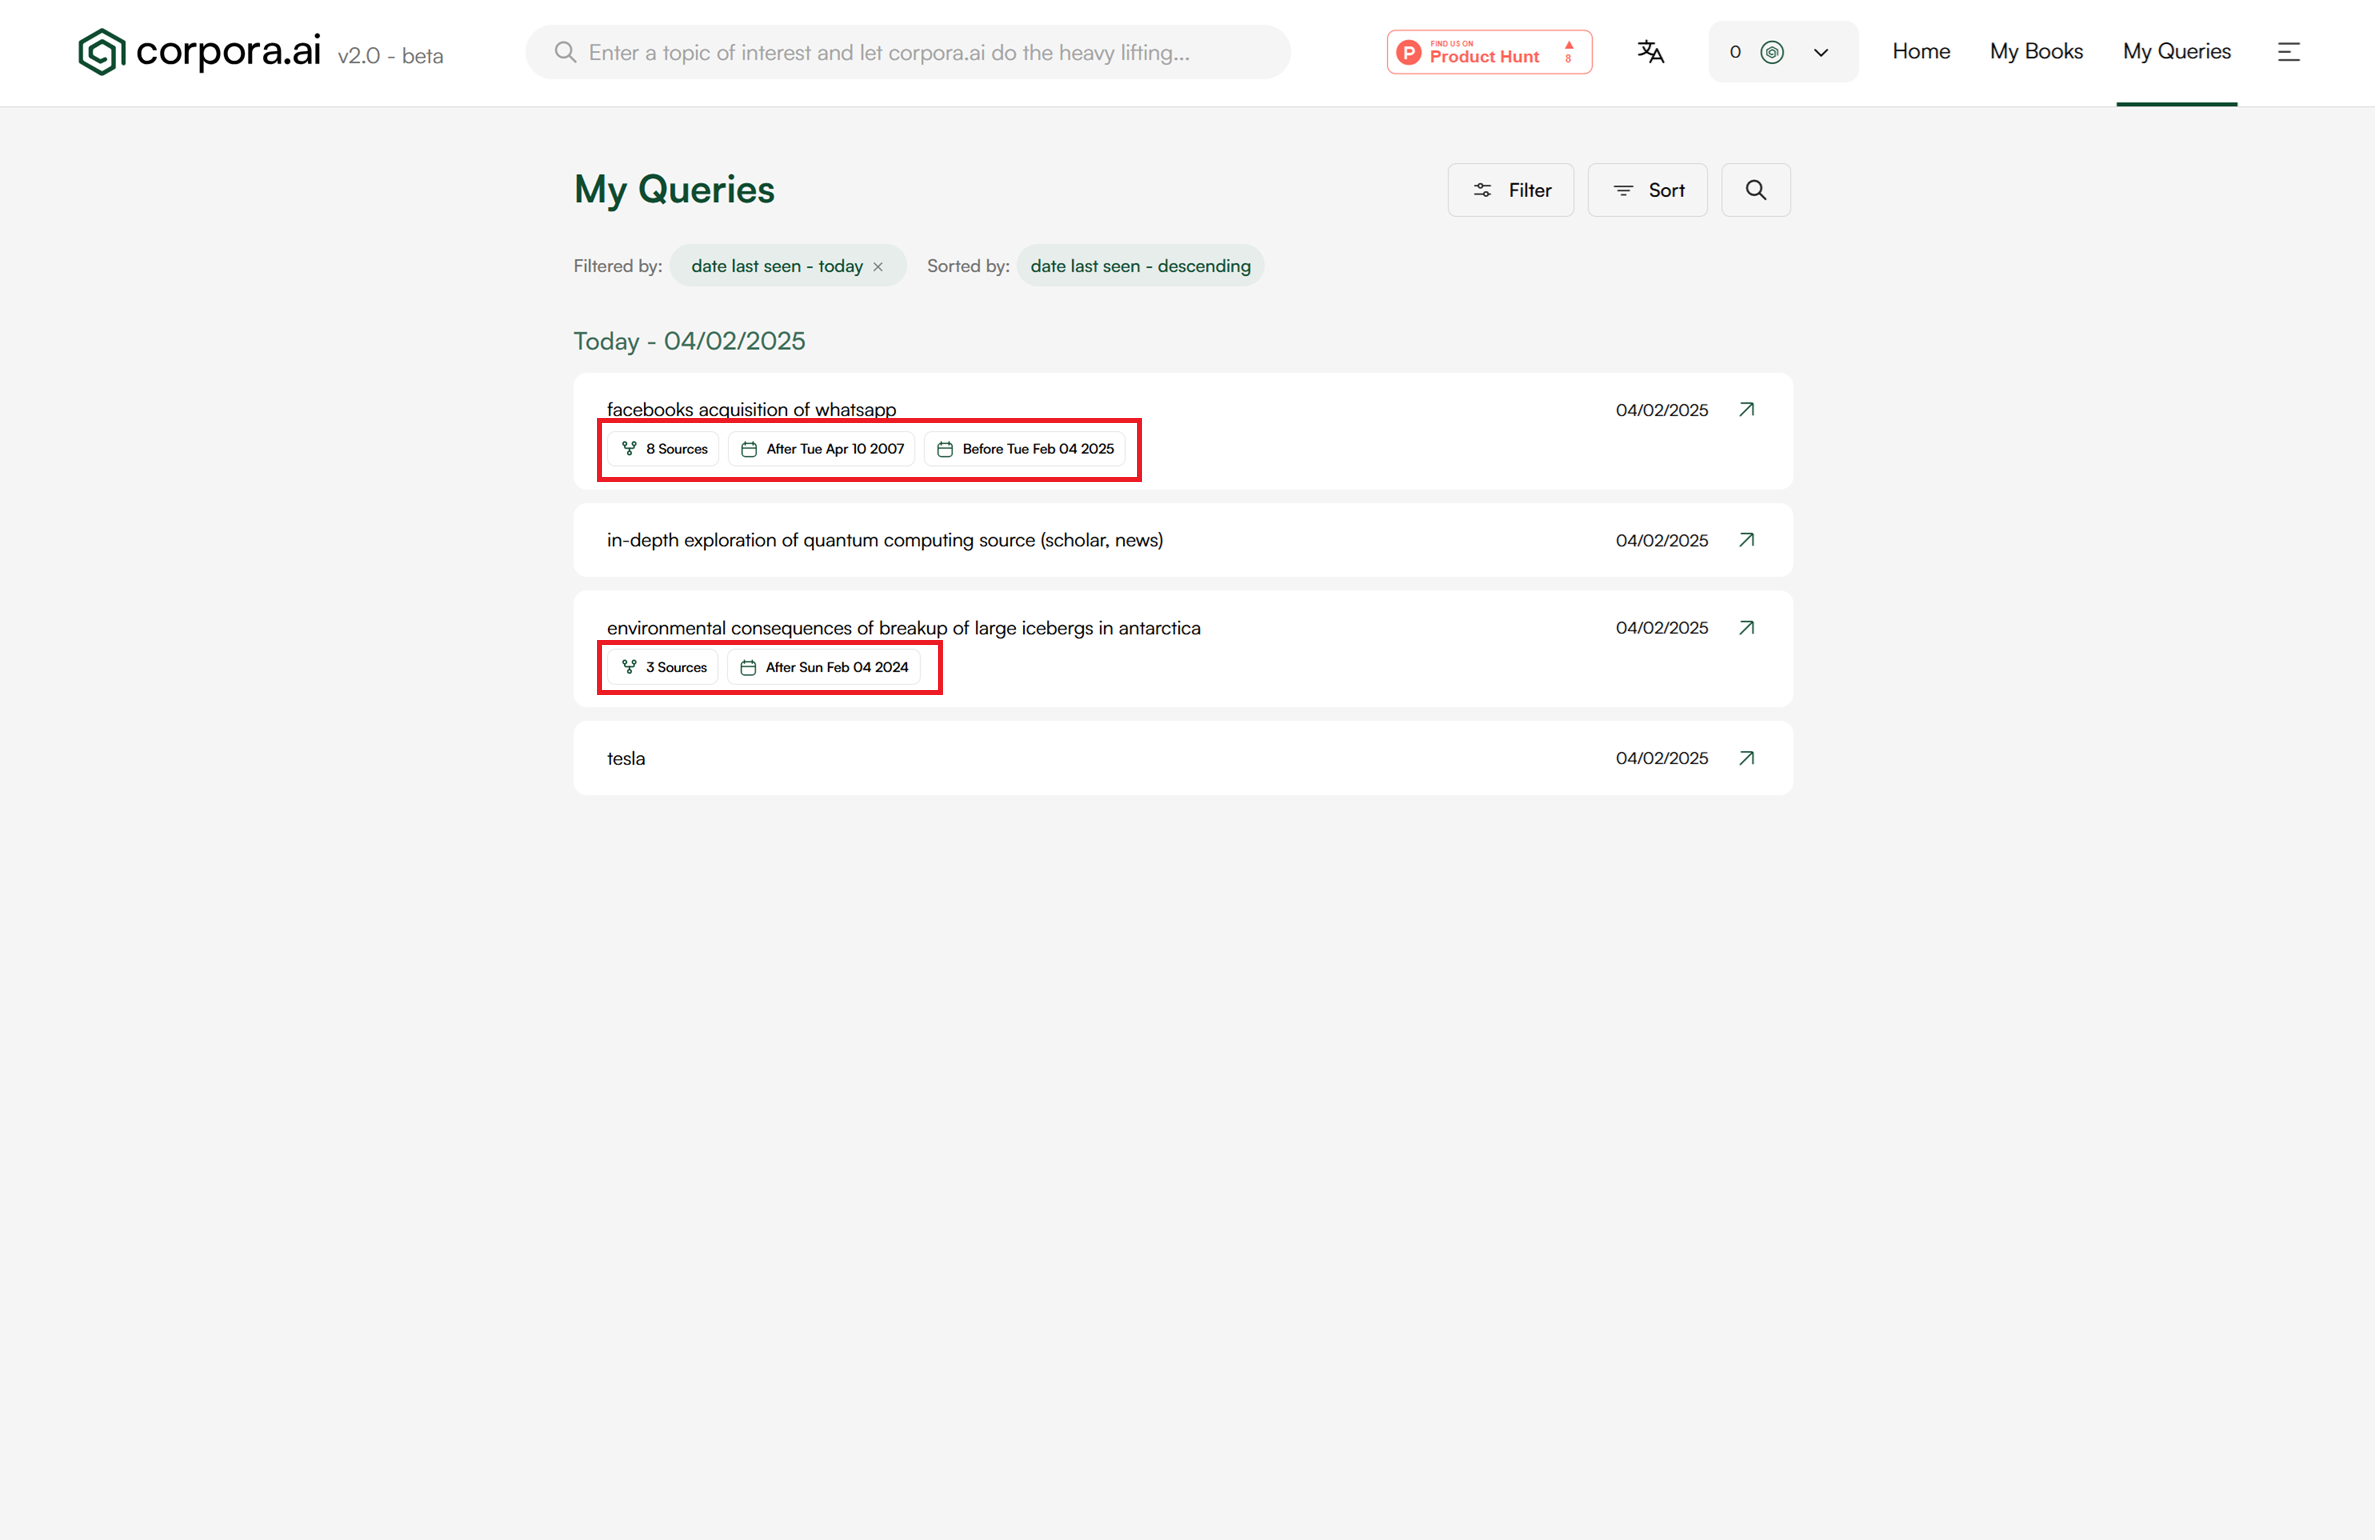
My Queries
As has always been the case, the page shows the list of your queries. The difference being there are now indicators within the card if there were Advanced Settings applied to your query. If programmatic CPL was used, this will still remain as a part of the query.
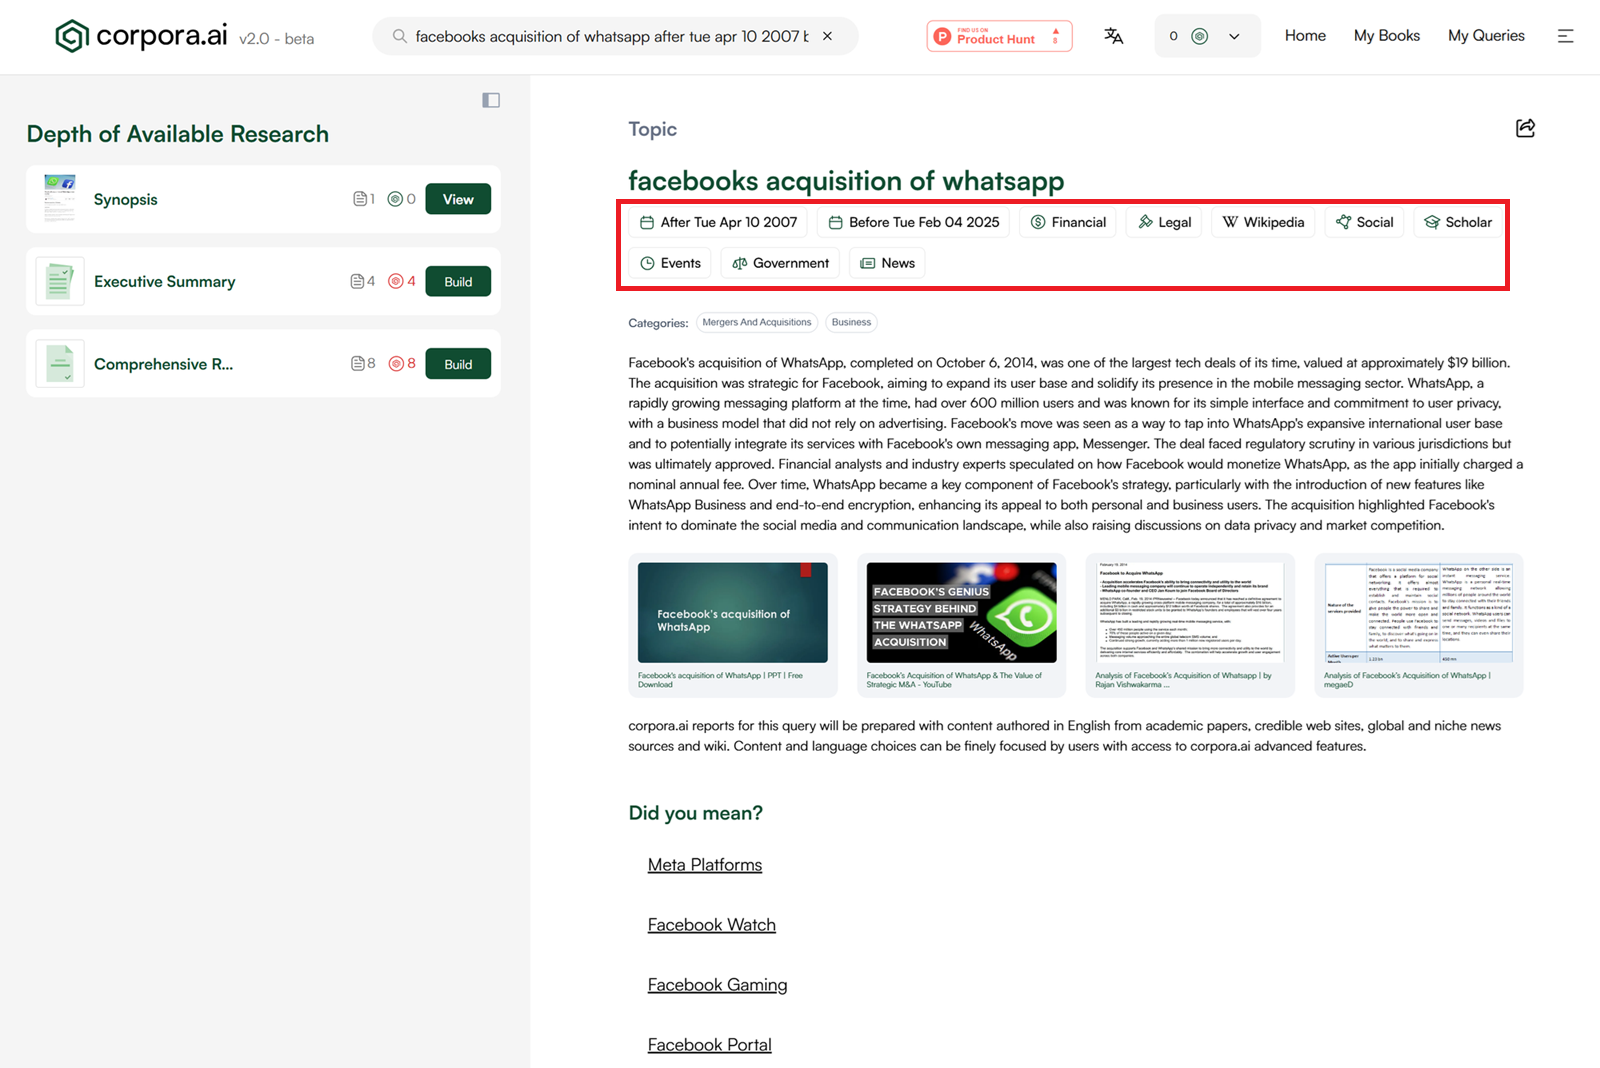
Overview
On the Overview page, we have added the same visual indicators below the title to make it clear what settings were used. Again, if using programmatic CPL, it will remain as a part of the query.
For Your Information
If you change your selected interface language it will clear your default query settings. This is to ensure that your source types are consistent with your choice of language.
How Can I Save My Settings?
Being able to quickly apply your previously used filters is easy once they have been saved. From the Query Settings page you can press the save button in the Filter Details box, which will save the values currently on your screen. Then your new filter will appear in the Saved Filters tab. From here you can edit and delete your saved items. To apply them as default values, simply click the card.
Video demonstrating how to save an advanced filter
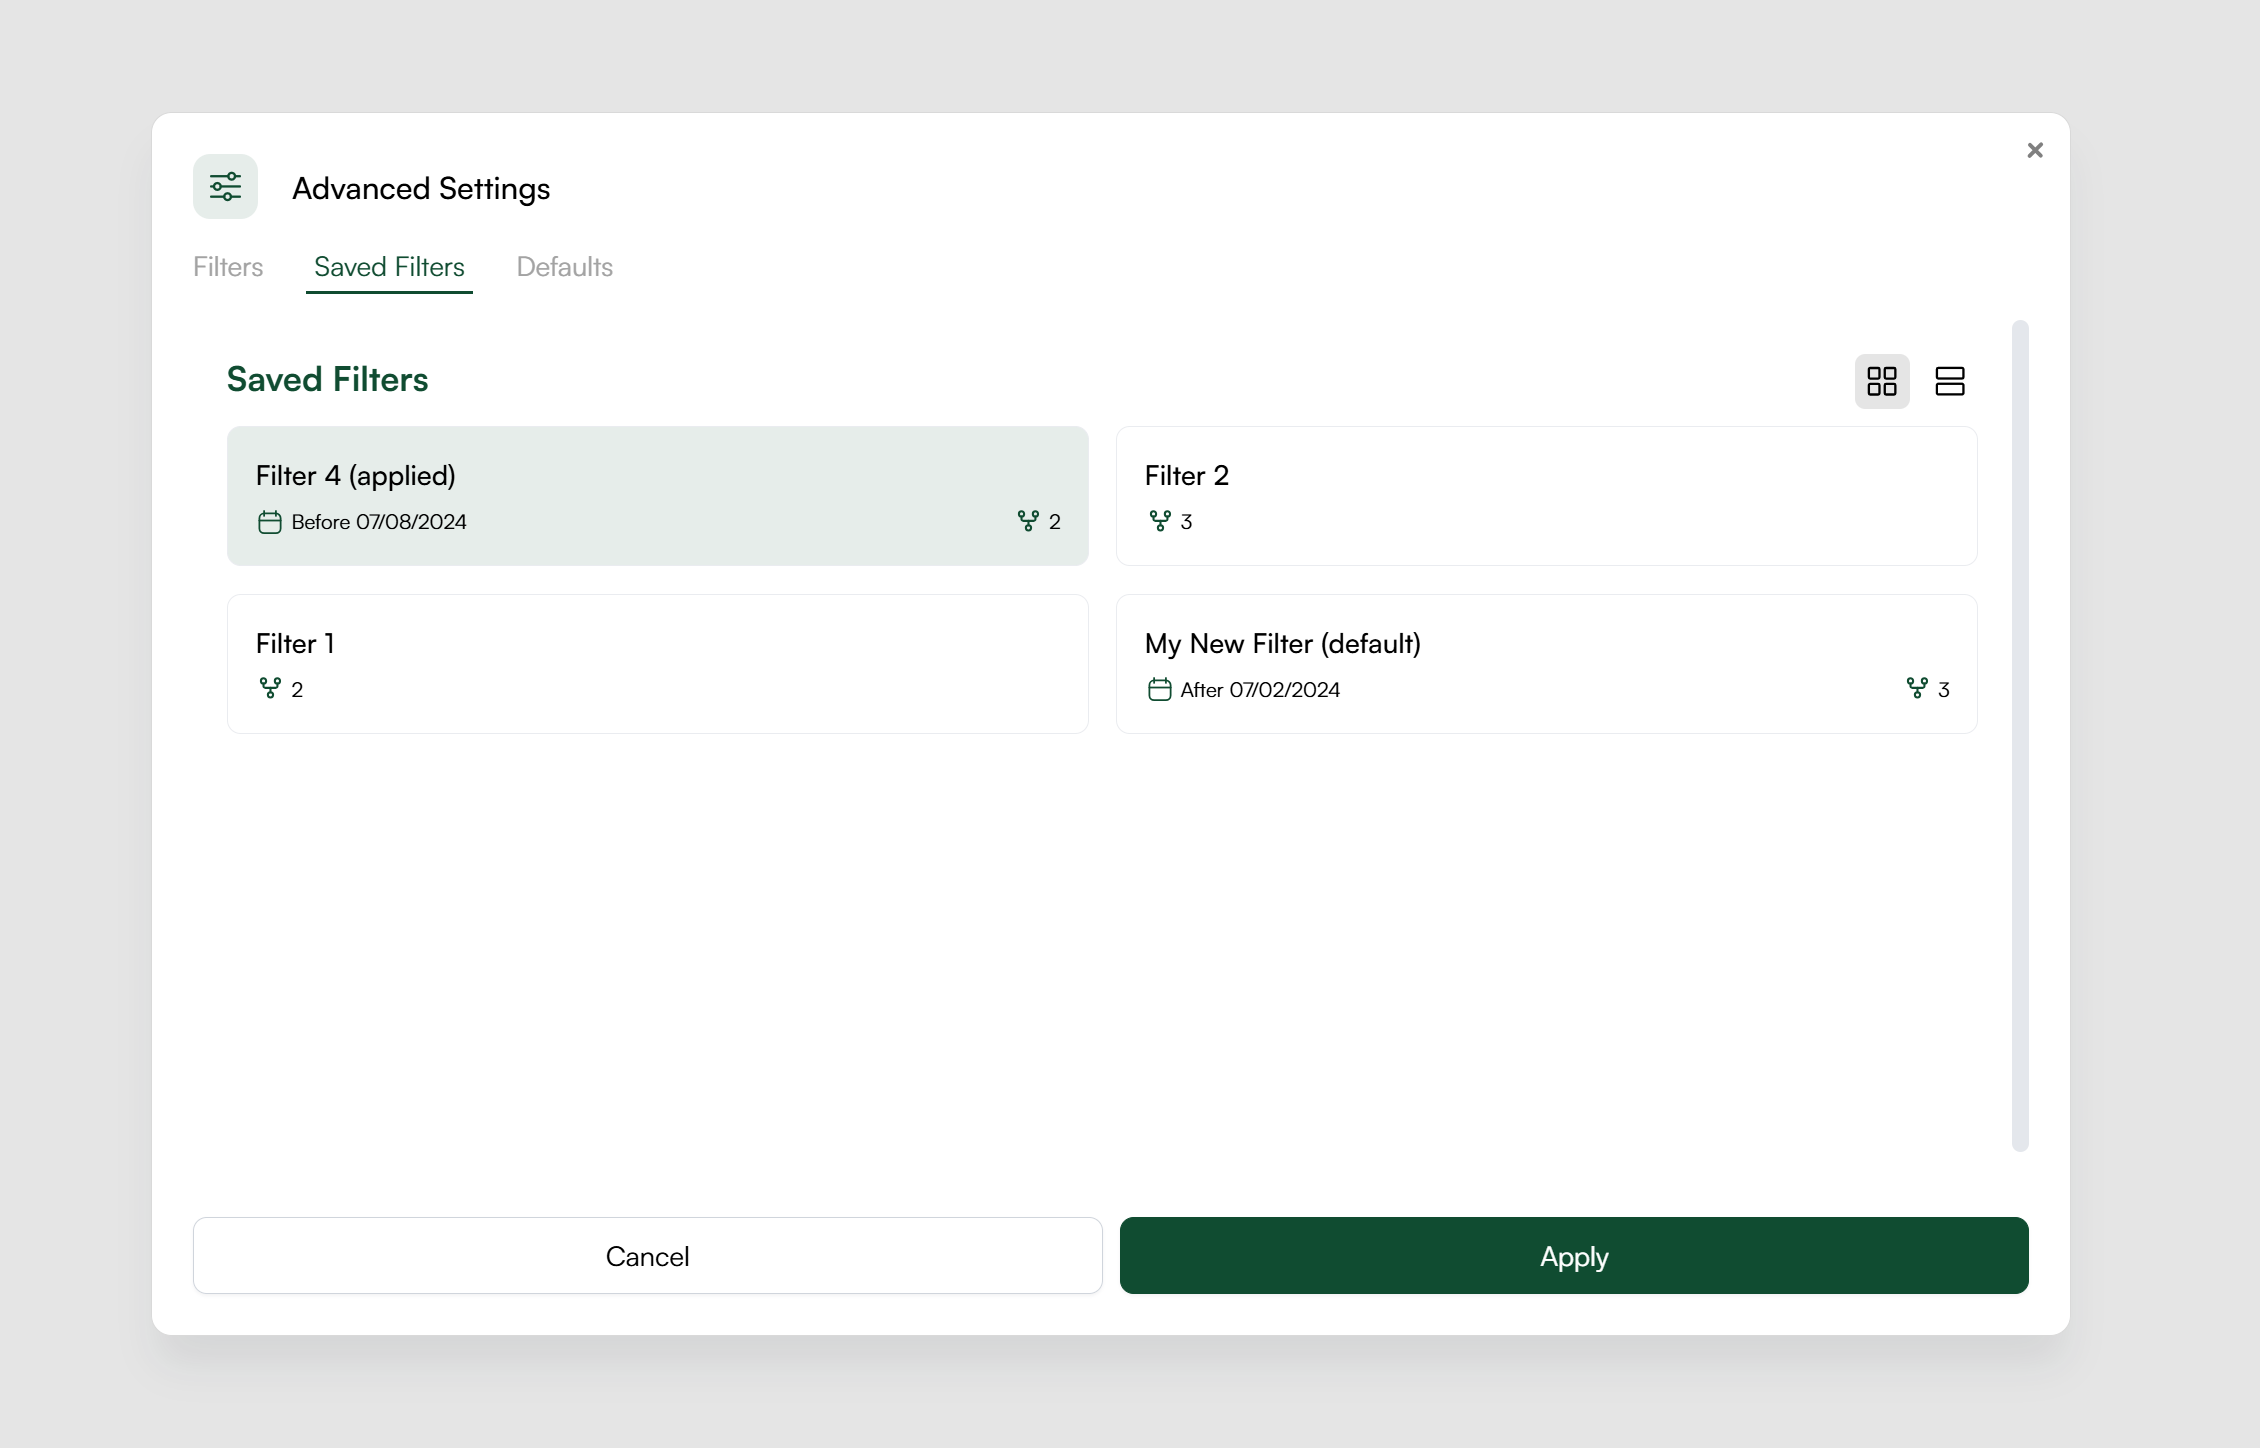
How Can I Use My Saved Settings?
As mentioned, your saved settings can be applied as both your default values and to your current query. To load them as defaults select them from the Query Settings page. To load them for your current query, open the Advanced Settings dialogue, navigate to the Saved Filters tab, and select the desired filters.
Conclusion
We hope that the new addition to the interface allows you to unlock your full research potential as well as this article and type of content being useful in making your corpora.ai research journey easier and more insightful.
We welcome all feedback via any of the following channels:
- Email: support@corpora.ai
- X: https://x.com/corpora_ai
- Facebook: https://www.facebook.com/61567821315594/
- LinkedIn: https://www.linkedin.com/company/corpora-ai
- Product Hunt: https://www.producthunt.com/posts/corpora-ai
Comments ()